-
Posts
1,754 -
Joined
-
Last visited
-
Days Won
252
Content Type
Profiles
Forums
Gallery
Everything posted by Xtra
-
Though I have been busy there are still CF & ABS V2 available at this time.
-
According to my records the first V3s should be arriving soon. Hopefully in the next few days there will be a review.
-

Fuel quality went full Amber Heard midway through a full tank..
Xtra replied to McToberson's topic in Edge ST
I have also found a loss of power in my car lately. I do believe it is the quality of the fuel we are getting now. Paying way more $$$ and getting way less quality. -
The V3 filter was originally designed to increase performance on an engine that makes 450HP and 510TQ stock. It is more than enough filter for a 325hp ST or even a modded Edge making over 500 HP. **This is the filter and lid I use for design and set up. Thats why it is dinged up.
-
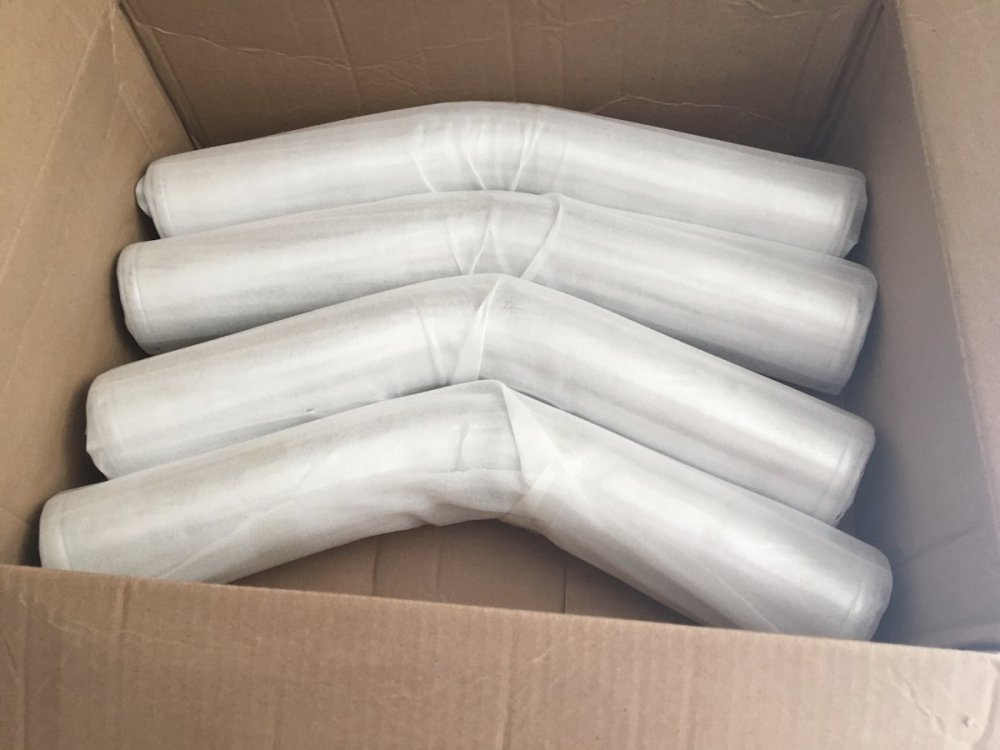
Every day more parts keep coming in . Another set of elbows awaiting fabrication into Elbow Reducers.
-
When the V3 arrives it at your door it will look something like this. This is a V3 unboxing and gives an idea of what to expect. . Open the box and remove packing. This is a V3 with the Auxiliary Air Intake Ii the box you will find the sensor and if you have the Aux Air, then there is a clamp for the Flex Hose The 30* and 45* Elbow Reducer and instructions The expandable Flax Hose Assembled V3 with choice of Oiled or Dry media Air filter The Aux Air intake on the lid.
-
The welder is hard to get ahold of because he is busy with welding for NASA and the International Space Station. Because he does such excellent work, it was worth making the 3 trips to catch him at the shop. I bring him pieces, he gives me parts. Reducer Elbows. fabricated, welded and polished, ready to go.
-
Here is a tip on how to use the double wire clamp included with the V3 AuxAIr. Flex Hose. The wires on the clamp go into the valleys between the spiral wire in the hose. This gives a clamping force in two places. It is going to be even hotter today. This is the temp at 11AM. It looks like it is going to be around 105 in the shade today. .
-
After shaping the V3 Aux Air hose adaptor it is held in place with Cleco fasteners. It gets glued in place with RTV to make an air tight gasket. Rivets hold the finished polished Aux Air Hose Adaptor in place and provide a strong mechanical connection.
-
The tubing for the Aux Air came in today, so I got busy on that. First a test fit with the hole that was just drilled. Then off to the saw. Managed to get 4 Aux Air blanks out of it. The Aux Air blanks with layout lines ready to cut to shape.
-
Once the Aux Air hole was drilled, it was time to install the sensor port. After fabrication, welding, and polishing the port is ready to install first The center hole is drilled. Then the holes for the rivets are drilled And finally the Sensor Port is riveted into place Sensor Port mounted and Aux Air hole ready. . Now to do the same to another lid.
-
Got up early today to avoid the heat. I worked on a lid for the Aux Air today and installed the Sensor port. I am still waiting the Aluminum tube for the Flex hose, but at least the lid is ready when it arrives. This is the jig for drilling the Aux Air hole. The lid bolts to it. Once the lid is bolted to the jig, it is mounted into the drill press. The jig holds the lid at the correct angel for the cut. A special bit is used to achieve a clean cut. I only get one chance so it is measure three times, double check twice, cross my fingers and drill. the hole. A nice clean hole drilled into an uneven surface ready for the aluminum tube that the Flax hose attaches to,
-
Fabricated one set of Elbow Reducers, and a couple Sensor Ports today. The next step is to weld and polish them. I have to take it easy, It got up to 103*F and I think I drank at least 10 gallons of water LOL
-
The 3 inch tube for the Elbow Reducers came today looking like this. A little while later it looked like this. They are cut to size but still need to be de-burred and prepared for welding.
-
Now that the Adaptor is sorted out, work begins on the other parts of the V3. The 30 and 45 degree aluminum elbows arrived today. Still waiting on some 2 1/2 inch thin wall 6061 tube for the Aux Air, and some thicker wall 3 inch 6061 for the Elbow reducers to arrive. There is only one V3 remaining from the first run. PM if you are interested.
-
After investing several thousand dollars, and over a year in design and prototypes, the V3 is ready. These are the first two V3 CAI Adaptors, finished and ready for a new home. The V3 is a drop in CAI system for the Edge ST and Sport with the 2.7L EcoBoost it includes: The V3 Adaptor plate Modified lid with sensor port. Sensor Clamps Filter - Pick one --- Oil, washable reusable filter --- Highest air flow with the least restriction. Dry disposable filter -- Best in dusty conditions and filtering fine dust . Still flows way better than stock OEM Two Polished Aluminum Elbow reducers 30* and 45* degree bend Everything needed for the V3 CAI system, complete and ready to install. *The AUX Air intake is still available as as option **Replacement air filters and cleaning kits are available online. The V3 CAI installed in an Edge Sport with the AUX Air Intake. The V3 is an exclusive, limited run, custom made CAI for Ford Edge Forum Members only. PM me if you're interested
-
I now wrap the part with painters tape for protection during cutting. The jigs are painted white, so there is a high contrast with the black parts. Make for easier viewing and alignment. I found that on some hot spots in the jig, the white paint would leave a mark on the part.. I can't have that, so they are all taped up now. This is the part before trimming on jig 2 This is after trimming on Jig 2.
-
Today I finished modifying the #2 cut jig to include the new angle. I added the wood strips in the jig to change the angel. The part aligns on those strips. Then the part is screwed down into the jig to hold it in place. The screws are long and do double duty by screwing into the bench to hold the jig while the part is cut. One side is cut at a time, Once the cut is complete the screws are pulled out, the jig rotated1/4 turn and screwed down before the next side is cut. This process continues until all sides have beed trimmed to height.. Screwing down the part to the jig and the jig to the table was a huge breakthrough for me . The parts are now consistent is size and quality. Up to now every V3 I made was a little different, now they will all be the same.
-
I also finish the first production V3 and test fit it into my car as well. Here the production V3 is on the right. It has a slight angle to the top and the finish work is much better In this photo the Production V3 is on the left and the difference in the quality is amazing. I was able to swap out the prototype V3 Adaptor for the production one, took less than 5 min. This is the production V3 installed. Notice how it sits a little lower and tilts back to the Aux Air Hose. To swap the Adaptors all ll it took was an 8mm nut driver. I loosened the clamps on the filter side of the Elbow Reducers, and left the Aux Air hose attached. When installing the production V3 Adaptor, the bottom two clips at the back snapped on all by themselves! (The J-Hooks ) . And the clip on top between the snorkel and lid also self clipped itself into place automatically !!!. It was amazing to see the Adaptor just drop in and latch itself. Much better than expected and a complete surprise. I am not sure what way is easier to do . Pre- build on a bench or just install it in the car. I think from now on I will just install directly into the car. Hard to say what way is the best. Oh! and the V3 is ready and if anyone is interested there are two V3 CAI units available now . Fits Ford Edge ST and Sports. All years with the 2.7L EcoBoost . PM me for more info, pricing and availability.
-
-
Started assembling the first production V3 today. First I had to cut those strips into parts. These are the J-Hooks and the large and small Tabs The new parts are much better than the prototype's. They give a cleaner look to the V3. Close up of the installed J-Hook, gasket and edge protector.
-
Today I was able to swap out the V3 lid while the Adaptor stayed in the car. I put back in my lid with the Aux Air hose intake. It was easy, I just unclipped the lid and loosened the hose clamps on the filter. I left the Elbow Adaptors installed in the accordion hose then swiped out lids. It was much easier than anticipated. Dang, it got up to 100*F today, will have to start my summer schedule soon if this heat continues. That's working in the mornings and evenings to beat the heat . It will become the norm by summer, do it every year. .
-
Snmjim and Special_K have done that job a dozen times perhaps reach out to them for some tips.
-
After seeing the V3 installed in my car, I decided to change the angle that the the lid sits at just a little. From the side the Adaptor now has a little more of a wedge shape. I lowered it 1/2 inch in the back. This is not finished, it needs to be fine tuned some more. I was just seeing how everything goes together. This lowers the back of the filter lid.
-


