-
Posts
1,754 -
Joined
-
Last visited
-
Days Won
252
Content Type
Profiles
Forums
Gallery
Everything posted by Xtra
-
Working on the wood base for the mold. Bondo putty is used to seal up any vacuum leaks. The vacuum hose attachment is in place, and all the holes have been drilled. All that is left to do is sanding, applying a finish coat and bolting the mold onto the base. It was designed from the beginning get 18 parts from one sheet of ABS. If it was just 1/2 inch larger in any direction then we could only get ten parts per sheet. The design, math and forethought put into this simple box equates to big savings.
-
Yes I understand. The big gulp intake you are talking about still empties into that same slot in the bulkhead that the V2 does. The V2 does same thing , but it uses ram air from across the entire grill and sends it over the top of the radiator. If you do the mod on page one of the Fresh air intake thread to your grill and install an V2 intake you are moving as much air as that slot can handle. And you get to keep your shutters. Unfortunately I have no plans to make something like that. as I feel that it is unnecessary when the V2 is installed with the grill mod. The V2 does fit 2015 , but if you have an ST then the big gulp might be your only choice.
-
Smart ?, great minds, I like it. ?
-
Your right it is in the same place and kind of looks like a plug-in lol ? . That was not my intention I was interested in finding the shortest most direct line to the air box that was accessible and doable with racing in mind. Several other people completely remove or punch holes in the left headlight when at the track. Both those mods let water in and wouldn’t work so well on the street, but are temporary. My mod keeps both headlights in place and working so it would work on the street, and it looks like a plug-in . You do have to cut a hole in your fender so it is permanent . Who would be willing do that even if it makes HP and looks good?
-
When you talk of race only mods the gloves come off. Things like cutting holes in the hood or body This screen air intake is in the correct location, but it is fake, it is just taped on for fun. It can be made to function and is compatible with the V3. No long twisting hose that has to be squashed to pass through small places. It is a short straight shot into the Air Box, and would make approximately 60% more air available as seen here. Plenty for all but the most hard core. An even larger hole and hose ( the next size up) would over double the air available . Yes, it would allow water to get into the system, a cover would have to be made to keep out the rain, snow and to wash the car. I am not going to do this as part of the V3 project.. I mention because it is a race only type mod and that was the subject being discussed.
-
These photos show just how not round and complex the aux air hole is from the side, but from the front it is round.
-
The snorkel is matched to the slot in the bulkhead perfectly, there is no reason to change it. If the slot in the bulkhead was cut and modified into a larger shape only then it would be necessary to also change the snorkel. I am trying to keep the design as a swap out with no cutting anyplace or removal of the shutters. If I wanted to build a race intake it would look much different as there would be mods that would be irreversible . Because in some states any messing with the intake is a not allowed, the V3 must be able to swap back to the OEM stock configuration for smog certification. That is why some of the things I do may seem conservative. Heck If the V3 was for race only, the gloves would be off. Thanks for the idea I need the feedback.
-
I assume you're planning to run off-road in some very dusty places and cross some deep water. If so that is a good choice
-
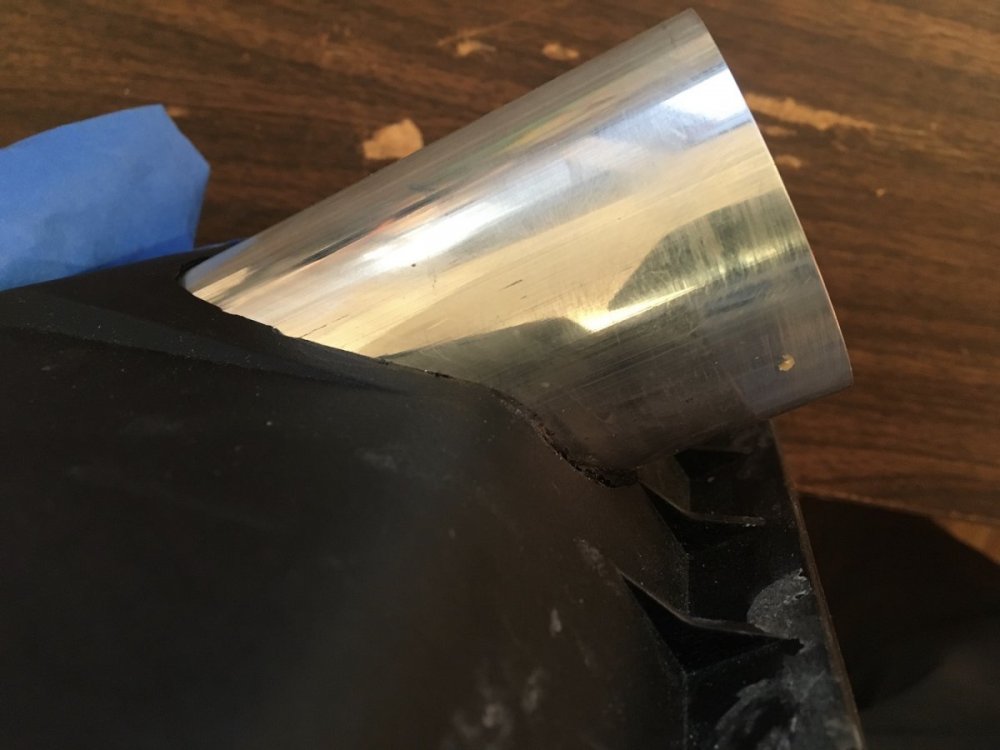
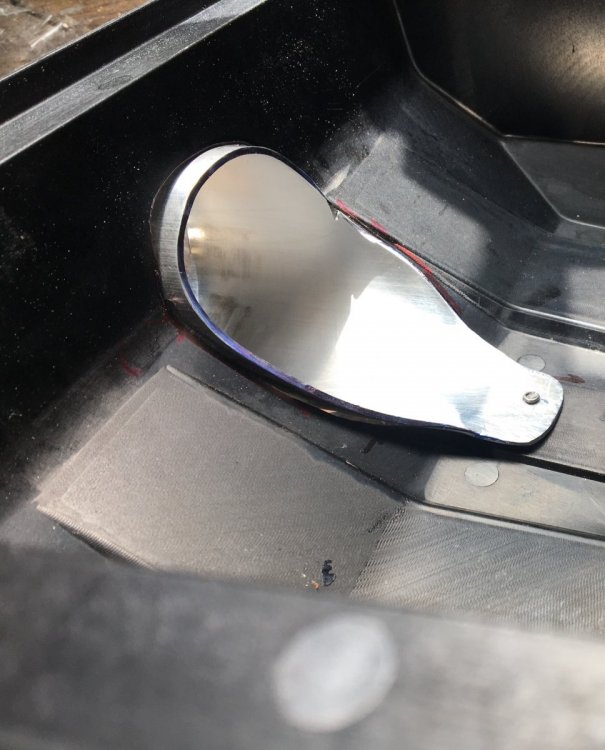
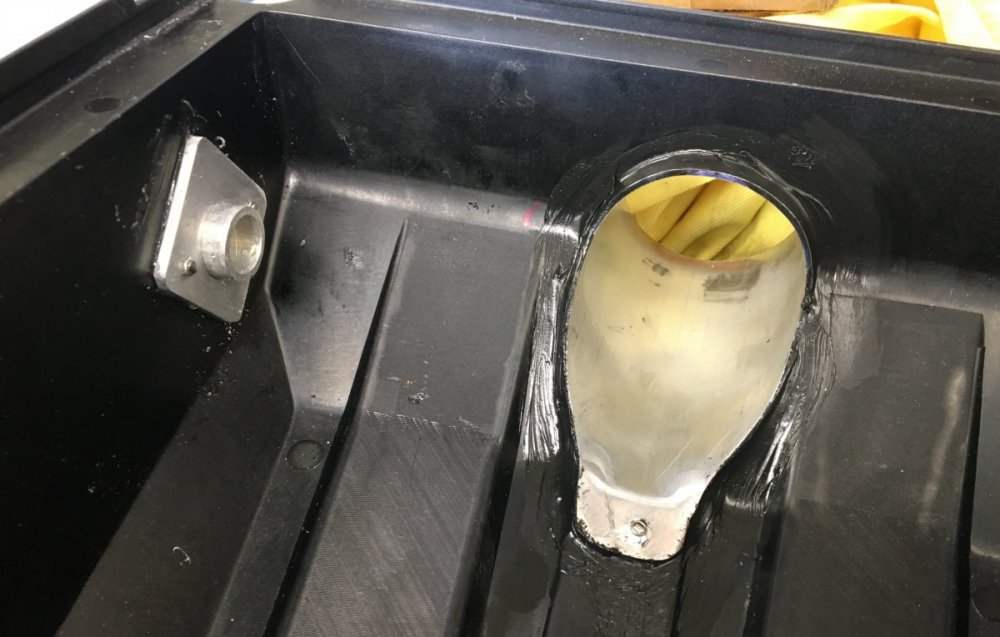
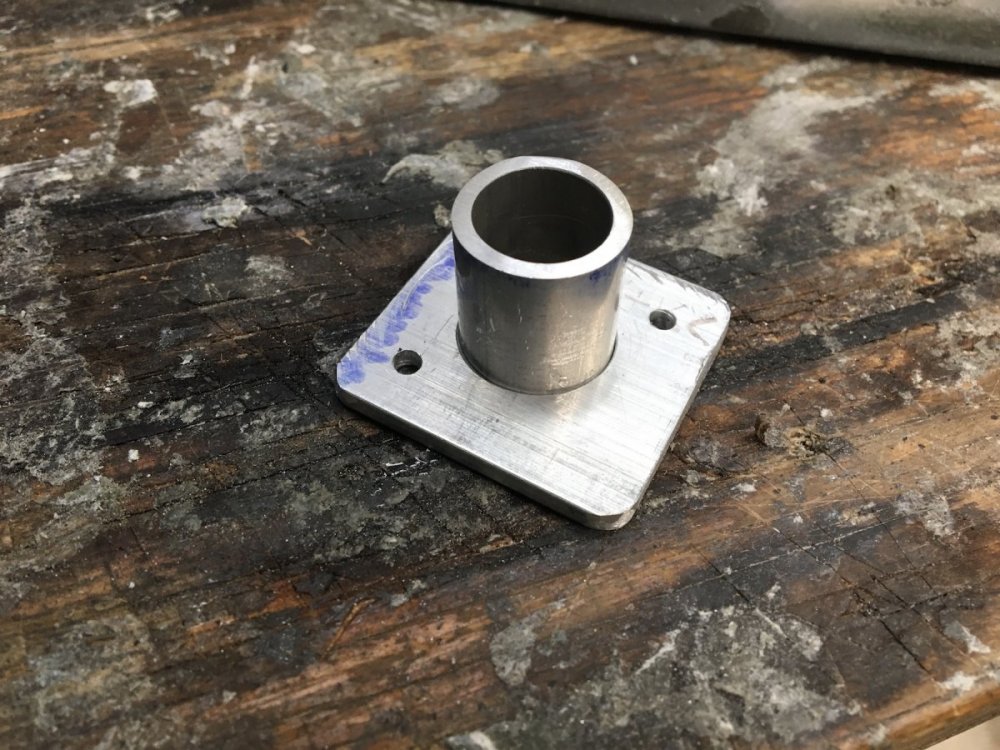
Duece, the reason is, that it is difficult to cut such a odd shaped hole. It is anything but round and although the jig I built to drill the hole into air box lid was strong it still allowed enough movement to scratch a delicate polished gelcoat like that on CF. If I can get it sorted and feel brave I might take a chance, but one little slip and I just bought a lid. There is so much hand work in this aux air for something so simple. This is the AuxAir intake tube . It was difficult to cut this shape and bend the tab for the rivet. I have made a cardboard pattern that should help with the next one. Here it is installed .To cut the hole for the tube it starts through the front of the air box, then the angle, then the lid some. The aluminum tube is cut to follow those lines. Here is the sensor and aux air mounts all sealed air tight. The aux air input tube is cut this way so air is directed to the top of the air filter, while the snorkel air comes in from the bottom. This allows for 360* air input into the filter.
-
Have considered routing that way. Cutting the hole in the air box and fabricating the aluminum tube is difficult and time consuming. I had to make a tool to cut that hole. And I am talking about true CF No aux air with the CF though. You are on your own with that mod LOL.
-
I finished the prototype V3 lid . It has the elbow reducers , sensor and aux air ports all sorted out. I just have to figure out where I am going to hook up the other end of the aux air hose. And how to route it, and how to it is going to attach This aux air feature may be an option as I believe it is not necessary on an untuned car. The V3 moves a lot more air than stock with less restriction. Optional on a tuned car and defiantly should be used on a modded car. Turbos ,FMAC that kind of stuff. It adds cost and labor and could be difficult to run the hose and install. So that is why I am thinking optional, not everyone may want it or need it.
-
It would be only the top half, the part you see. The rest would remain the same. It would add more cost than complexity and this project is already pushing the cost limits as it is IMO.
-
What if ? I was thinking ...What if the V3 was offered in real Carbon Fiber as an option. The real deal Carbon Fiber, not carbon fiber material as in the V2. I have no idea how much it would cost but it could be an option. What do you think?
-
That is a good idea, and easy enough to do. I will update you on this matter at a later date. I am curious as well.
-
I have checked for you and fitting the V3 in with that battery will be very close, and it does look possible. Unfortunately I cannot give you a clean yes or no for fit. I guess the only way is to test fit it.
-
You said it. And I feel the same way !!
-
Had a powwow with the plastic shop today about the new vacuum mold. Should start building the wood base later this week.
-
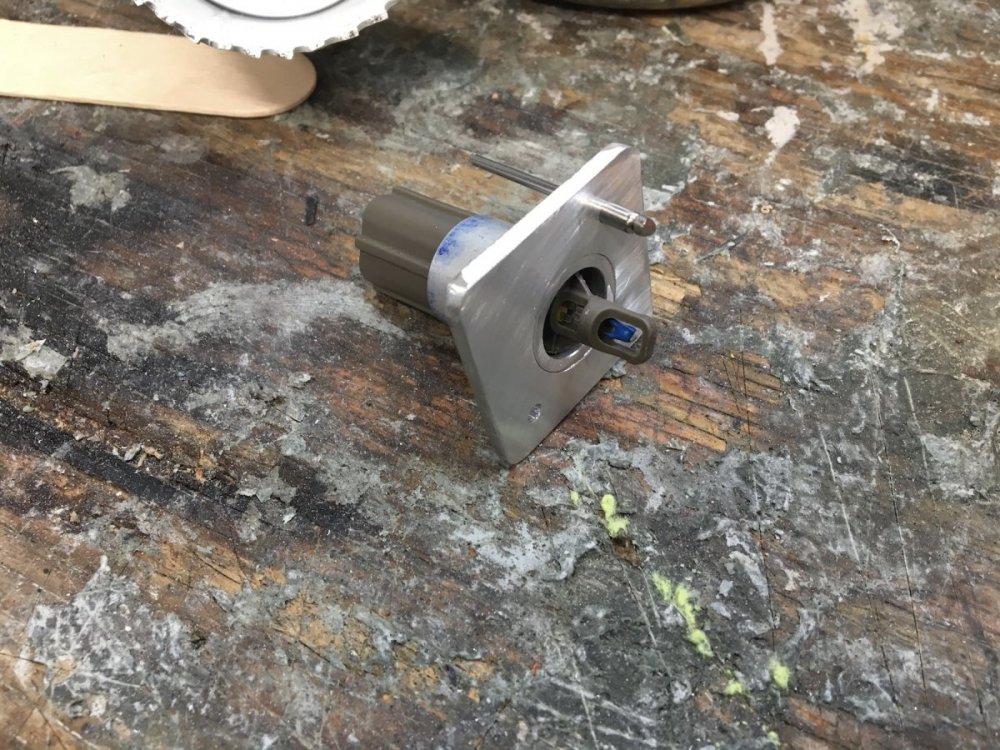
Today I worked on the sensor mount. Unlike the elbow reducers that needed welding all the way around this part also needs welding, but just a spot or two to lock the parts together . It will be pop riveted into place with some RTV to seal things up . So much fabrication in this project. The sensor just slides into place and has an O-ring to hold and seal it. Two pop rivets mounts it to the air box.
-
True that. The V3 is pushing the cost limit as it is, and I am struggling to keep the price down as much as possible. The costs are so high because I am buying so much off the shelf then modifying it. Who knows it may end up changing direction by going back and rethinking the first design in order to lower the COG (Cost of Goods )
-

What have you done to/with your Edge/MKX today?
Xtra replied to WWWPerfA_ZN0W's topic in Accessories & Modifications
It has been a couple years, but the fires are back. When I went outside this morning the car was covered with ash. This time it was not near The Snake, but it is still in the same mountain range closer to Santa Monica. California snow. -
Thanks MSCOSC glad you like it. You are correct sir, the OEM snorkel does snap into the air box. It is my intention to use rubber top bulb edge gaskets. I posted a photo of the two different ones that I am considering. There is no chance of the snorkel getting out of place with the V3 because the fit is so tight it can't move that much.The main consideration is stopping any hot air from getting in.
-
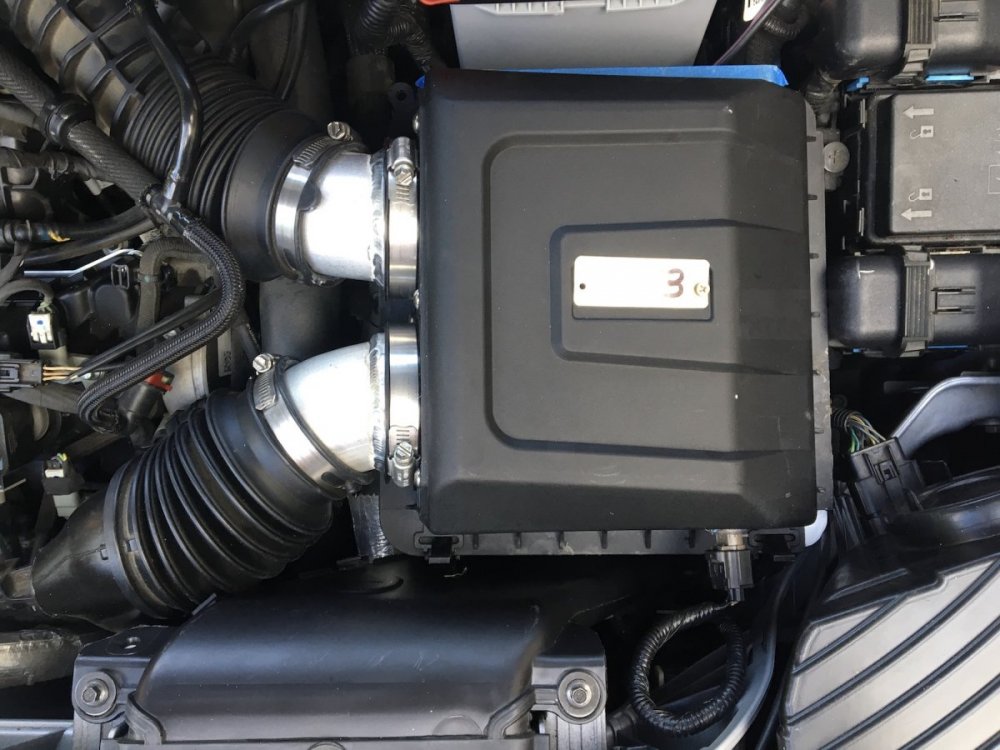
After I test fit everything and the sensor was installed I thought ... What the heck, take it for a drive. So that is exactly what I did. I started the car checked for warning lights and went for a short 5 mile drive.. The car seemed to quiet down some and run smoother . I did not try to set a new 0 to 60 record just drove it around . After the drive I pulled the intake and checked for any problems . The cardboard and painters tape is not very strong and if there was any thing hitting rubbing or over heating it would show quickly. Everything looked great so onward. I put a tag on the air box only for ID . I have no intention of putting a label on it when finished. Here are a couple photos of the V2 in Carbon Fiber and the V3 working together for the first time.
-
Now that all the parts were taped in place I needed to see if it would fit in the car. I decided to drill a hole for the sensor and temporally installed it as well for a full dress rehearsal. Here you can see just how tight a fit it is as the Air Box touches the fuse box ( I think it is fuse box) , but it fits. You can see the sensor hook up as well in this photo. The mandrel bent elbow reducers close up. Just because
-
To test the fiberglass plug I shaped cardboard over it and hot glued it together to make a paper part. After spray painting I taped the replicate cardboard part into place on the air box, and tested it for fit. I then cut some foam core to size and cut a port for the snorkel, and taped that into place on the air box as well. Now I had all the parts in place to test fit it into the car. I did not want to build it first then find out there were problems with the fit better to fix paper parts than ABS ones.
-
Today was a very good day. I accomplished so much. I was able to get the draft angles set and the fit fine tuned. it is ready for a finish coat and to be transformed into a vacuum form mold.


