-
Posts
1,754 -
Joined
-
Last visited
-
Days Won
252
Content Type
Profiles
Forums
Gallery
Everything posted by Xtra
-
The jig assembly is aligned, up and down, right and left, and in and out. it is double checked then checked again .. then finally drilled. Success a clean hole drilled. Here the tube is trimmed and fitted ready to be cut to length and riveted in place.
-
Drilled the AuxAir hole in a lid today. This is what I hold the lid for drilling with. The wood sticking up is what goes into the vice. Notice that the sides are not 90* , but angled. This is done to position the lid in respect to the drill that only comes straight down. If you can't move the drill, move the thing you are drilling. The bit is in the background. Here the lid is mounted to the jig ready to go The jig and lid assembly are clamped in the drill press cross vice.
-
The new thicker Adaptor ready to be cut out. Here you can see just how much thicker the new Adaptor Plate is compared to the first one.
-
The shop made a new thicker prototype of the Adapter Plate, and it came out fairly good. You will understand when I post the photos The mold held up to the thicker material and it pulled in good at the top where I did not think it was going to. It is because the top is the first thing the hot material touches. Then at the base after pulling down just 3 inches and one half second later it had trouble making a 90* tight turn. I think because the material had cooled off a few degrees and it became stiffer and there was not enough vacuum. Perhaps some more holes around the base will help. It still needs to be cut out and trimmed before I will know if it is going to be strong enough or if I need to go to plan “B” ?
-
Because the shop cannot mold the parts this week, I took the mold home to do a little touch up and drill a couple more holes in it. The new holes should help with consistency in pulling the material tight onto the mold. And in retrospect using fiber glass for the mold has worked out great . It can be modified and repaired easily.
-
The CF arrived today and I had enough time to get it to the plastic shop before they closed. They cannot get to it this week but hopefully by next week they can do a run of ABS and CF V2 intakes ?
-
OH My.... I just realized that I have never tried the V3 with the engine cover on!!!
-
This photo shows the clearance between the battery and the V3. The battery in this photo is H6 size it is larger than the OEM, and there is one size larger battery that can fit into the battery box. The V3 looks like it will clear any battery that does not extend past the battery box.
-
Yes ! the Carbon fiber material has been made and paid for. It did not take as long as last time I ordered it, and I am just waiting for it to arrive. Within a few weeks finished CF and ABS V2 intakes will be in stock and ready to ship. .. PM me to get more info or reserve yours. .
-
TT Steve , I have custom Comp turbos, FMIC, other mods, and a tune by Joe Granatelli, the son of Andy Granatelli and X indy racer . That may have something to do with it. You are still on the list, and I am working on an adaptor plate that I hope will work on the ST. The adaptor plate will keep the OEM bottom half of the air box and use the V3 top half.
-
Thanks so much, and glad you like it. I can feel the difference and at some point I will put the car on a dyno and get some numbers . For now all I can say for sure is I saw a small increase in milage and my butt dyno says it makes more power than stock. I ran a 4.55 sec. - 0 to 60mph yesterday and I did not have any octane booster in the car and it was with a 91 tune. I have run those numbers before but I was on a 93 tune with 91 gas and octane booster added. . Hopes that helps some.
-
To me it looks liker it will fit no problem. The plastic shop is working with me on the V3 Adaptor the uses the stock bottom half of the air box. So.... if the custom air box does not fit, the Adaptor should.
-
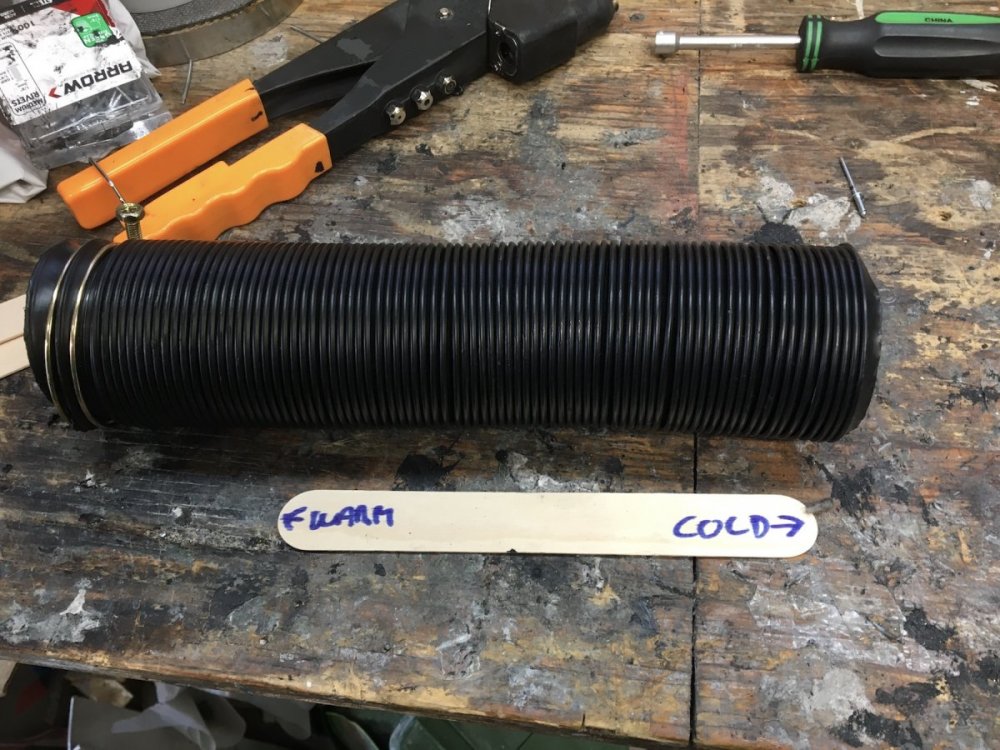
Test fit all three air boxes today, and they all worked and fit great! I was able to re- install the OEM air box as well. Now I can continue work on them while the car is in the shop. When I removed my V3 it was in like new condition and showed no damage or rub marks on it . The insulation was loose in a couple places and I just pushed it back down . . The aux air input hose gave me some info when I removed it. The end marked cold is where the air enters, the part marked warm is where it attaches to the V3 Air Box. it proves that I am finding cold air to feed the V3 and the hose got warmer where it is in the engine compartment and was actually cool to the touch where the air enters it.
-
I am starting another run of 4 ABS and 5 CF V2 intake. Please PM me to reserve yours now. One of each has already been reserved. Thanks
-
Thanks for your interest in the V2. The black textured ABS - V2 is $125 + $45 shipping and $5 PayPal fee = $175 total delivered in the continental USA The CF - V2 is $185 + $45 Shipping and $9 PayPal fee = $239 total delivered in the continental USA ** Both include instructions and 5 longer clips for the front 5 holes. Please PM for more info if you are interested.
-
Just finished gluing and riveting V3 # 3 . It needs to dry over night, and with any luck I will be able to test fit all three tomorrow in my car. I need to do this as the car is scheduled to be taken into the body shop on Wed. If I can test fit all three V3s I can continue work on them and finish them even if the car is in the shop. The timing is good as I don't want to send my car into the shop with the V3 installed, so when I pull out my V3 and finish testing all the others, I will install the OEM air box and filter. I want the car to appear as stock as possible so there is no excuses on why I hav a code that says that I have a vacuum problem with the gas tank. I think a vent tube was crushed when I was hit, or the fuel filter is clogged up. Car still runs great, I just did a 4.55 sec - 0 > 60 mph even with a mashed rear bumper a the check engine light on. lol
-
Fabrication is finished on V3s # 1 & 2. They do not have insulation though because I need to check with whomever to find out if they want me to do it or themselves. The V3 has to be insulated to protect the thermoplastics from excessive heat and to keep the air charge cooler. This is complete V3 #1 as one would receive it. Everything but filter and snorkel. I can supply the filter if wanted, but why do that when it is available on line. I will supply the links so one can just click and buy the dry or oiled reusable filter. V3s # 2 & 3
-
Lots of Ford parts are used to create the V3. The lid is held in place with OEM clips, and the Air Temp Sensor is also OEM. This is the complete V3 as the original snorkel that came on your car is re-used. V3 with snorkel attached for test fitting. I test fit each snorkel adaptor plate several times during the build. I do this because it is such a tight fit some people may think it does not fit at all when they try to install it themselves. When I do ship a V3 I know it will fit in the car and the snorkel will fit the V3, because I have already test fit and checked for any problems. There is a tight fit with the one clip that is behind the snorkel. Then again, everything on the V3 is a tight fit.
-
The gasket is attached to the lid, held in place with double sided tape, and is die-cut for a precision fit. The gasket is made from high density foam and is around 1/4 inch thick to provide a air tight seal.
-
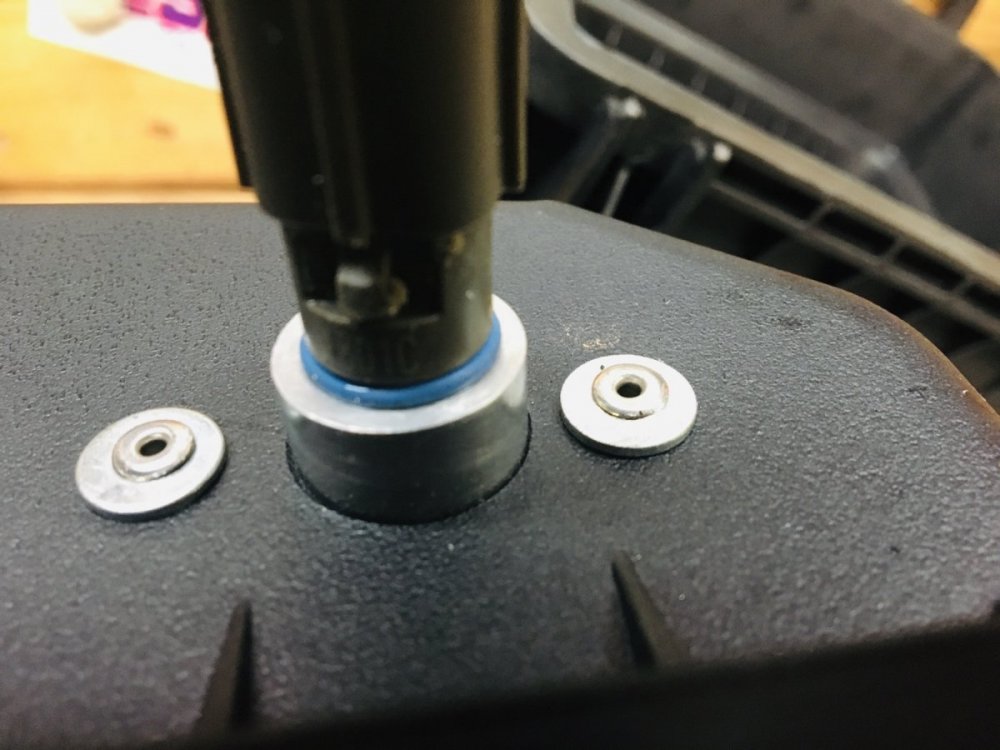
The sensor has an O-ring that seals and holds it in the sensor mount. It is a press fit and may need a little lube or spit to let it slide in.. lol. The sensor pressed in all the way . This is how the sensor looks on the inside of the lid when installed.
-
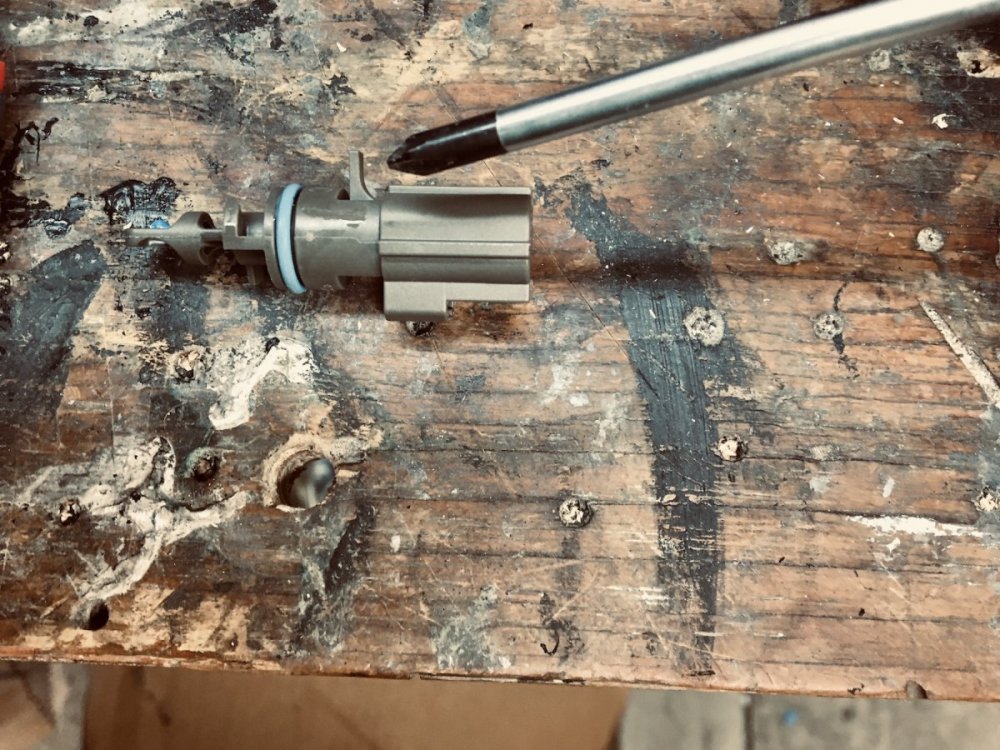
Decided to work on the lids some. This is the Intake Air Temp Sensor mount installed on the lid. This is the what the mount looks like on the inside of the lid. The sensor has to be modified in order to mount properly. This tab has to be cut off and made flush with the round barrel of the sensor.
-

What have you done to/with your Edge/MKX today?
Xtra replied to WWWPerfA_ZN0W's topic in Accessories & Modifications
Thanks enigma-2, I made a copy of the car wash security camera footage that shows her driving 10 to 15 ft forward and hitting me. The video proves that I am a victim and not at any fault. This is now in the insurance co hands. The car will be repaired, and I was so close to test fitting all the V3 that are in the works. this will set that back. If I could test fit them before the car goes into the body shop then the Bottom Half's would be done except for insulation. -

What have you done to/with your Edge/MKX today?
Xtra replied to WWWPerfA_ZN0W's topic in Accessories & Modifications
Well it happened, and where you would not expect it. It finally rained in So Ca yesterday, so I went to the new drive through car wash today that opened a couple of months ago. There I am sittin' in my car going through the wash and Wam!! Big Bump, my sunglasses fly off, a loud claxon sounds and, the carwash comes to a stop. I just got rear ended in a car wash!!! The lady lied and said it was the machine and it did it to her as well. Upon review of the video she accelerated, dove over several of the tire pusher wheels and rammed into me. Then she lied and lied some more, but the video got her ramming me, she put the car in gear and drive into me. What a lying scumbag. Damage to the rear bumper and rear hatch door . My neck is stiff. -
Now the ugly close ups. . Here you can see just how messy the RTV is. It is very difficult to work with and it gets everywhere. After I attach the Bottom Half Patch with Clecos, I use a heat gun to hand form the patch for a precise fit. What happens is the stretched ABS shrinks when heated, and the nice straight lines end up looking like this,. or worse... No worries though, as it will never be seen, because it will be hidden under the insulation. This is a good example of function before form.
-
I have started to rivet and glue the Bottom Half together. The black RTV is messy as heck, but I believe it is the best adhesive to use because it is flexible, heat resistant, waterproof, and will create an air tight seal that should last for years. You can see just how messy the RTV is on the bottom right of this photo. The cosmetics of the patch don't matter as much as getting a good air tight seal.


