

HyPer
-
Posts
20 -
Joined
-
Last visited
-
Days Won
1
About HyPer
HyPer's Achievements
")
Newbie (1/14)
-
Tail light bulbs
HyPer replied to igcitng's topic in Glass, Lenses, Lighting, Mirrors, Sunroof (BAMR), Wipers
O.o Yeah, ok, the next vehicle we'll be modding is a 330xi, I'll take a video of the hids we put in there. Just curious though, I've looked at a bunch of the other threads on here about lighting, and from what I've seen, there's alot of myths running around about HIDs and so forth, mostly dealing with color temps, difference between 35w & 50w bulbs, etc. Is everyone using el cheapo $20 HID kits from dirt-floor chinese factories or something?? -
Tail light bulbs
HyPer replied to igcitng's topic in Glass, Lenses, Lighting, Mirrors, Sunroof (BAMR), Wipers
Wow, 6 seconds is a long time!!! You need to find faster ballasts man, longest we've ever used was 3-4seconds, and those are our cheapest kits. -
Tail light bulbs
HyPer replied to igcitng's topic in Glass, Lenses, Lighting, Mirrors, Sunroof (BAMR), Wipers
Well ofcourse we wouldn't use ballasts that required time to warm up, lol. -
Apparently I have to have 50 posts to even respond to a personal message.....I'm not going to spam up the forums to build up to that point, so you can contact me via text/mms/call at my work phone: 601-618-3867
-
Here's what I wrote originally:
"Well, it includes the bulbs, extended wires, ballasts, adapters, & harness to power them. One of our bad habits, is we never think to take pics while installing, but for a clean install, we hid the ballasts and wires.
First we removed spare tire cover, then removed side pockets around spare tire, then removed rear door sill, then rear side panels. The vehicle came with a tow package, so there was already a large power source...
-
... available to tap into to fire ballasts with, for a vehicle without though, you would need to run a wire up front to either the junction box, battery, or an unused fuse holder in the fuse box with a 20amp fuse.
We might have to remove the rear area again, thinking of using the vehicle in SQ competition, so we'll be hiding some audio, which will give us a chance to take pics. To route wires thru to the taillights, we cut a small slit in the factory grommet."
-
-
Led Puddle Lights
HyPer replied to Muser99's topic in Glass, Lenses, Lighting, Mirrors, Sunroof (BAMR), Wipers
Super glue seems to act as a good holder for something that won't see any real world stress or flex, like the puddle lights. But you should still squeeze in a small amount of clear silicone to prevent water seepage. Remember, it's not just gotta be waterproof, but also air proof, as air holds moisture that can condense on the inside of lens when it cools. -
Tail light bulbs
HyPer replied to igcitng's topic in Glass, Lenses, Lighting, Mirrors, Sunroof (BAMR), Wipers
Would you care to elaborate? We've done the HIDs in the tails as a test without the LEDs, the brightness is controllable via glare shields placed correctly, but with newly designed lenses in the works, they can be made to run HIDs without blinding people, if that's what you were referring to? -
LED Turn/Tail/Reverse Lights
HyPer replied to Subzero's topic in Glass, Lenses, Lighting, Mirrors, Sunroof (BAMR), Wipers
To be bright enough for running lights AND brakes(as usually if you get bright running lights, the brake brightness isn't going to be a big difference), you can get dual stage lights that have 2 separate circuits(versus ebay specials with single circuit and dual brightness). The brightest would most likely be one with multiple side rows that illuminate for the "low beam"(running/parking light), then a large directional Cree LED on the end to illuminate while braking. For turn lights, amber/yellow/red colors are fine & using a single beam 3156 LED with multiple 5mm chips is plenty bright, even for daytime use. For reverse, if you have a backup camera, you can get away with running small LEDs, or LEDs of any variety; but for models without reverse camera, your best bet would be an HID kit mounted back there. -
Led Puddle Lights
HyPer replied to Muser99's topic in Glass, Lenses, Lighting, Mirrors, Sunroof (BAMR), Wipers
Also, if you're running large circuit boards, you can delete that reflector in the housing, as it's not needed since LEDs are directional. That will give you extra space to work with. -
Tail light bulbs
HyPer replied to igcitng's topic in Glass, Lenses, Lighting, Mirrors, Sunroof (BAMR), Wipers
Another project that will hopefully soon surface is a hybrid LED & HID Park/Brake light setup. We haven't started on it yet, but it's such a crazy idea, that I doubt announcing it early will cause any other company to steal the idea. An LED halo shaped to the exterior edge of the taillight for nighttime/running/parking lights, and a red HID brake light bulb. -
There's not really a plug 'n play option for dual intensity HIDs, as there isn't enough room in the hole of housing. Hole is only maybe 3/4" in diameter, so really limited. Normally cutting a larger hole wouldn't be an issue, except the back of housing is recessed right where the reverse socket goes, so you're limited in space. Short of doing a projector reverse light, you're pretty much stuck with a single brightness HID as the ultimate lighting option. Now there is a way to do a switching HID, so that it illuminates the ground when backing up, then hit a switch and it illuminates everywhere.....but it requires using a bolt-in adapter plate. We're just getting into that, so it'll be a while before they're hitting the assembly line.
-
They can for a little while, I tested a 35w(actual draw: 42w)and I pulled the bulb after 2min and the plastic inside of housing had that tacky feel, like the plastic was starting to get soft.
-
Tail light bulbs
HyPer replied to igcitng's topic in Glass, Lenses, Lighting, Mirrors, Sunroof (BAMR), Wipers
If you want to continue using bulbs, look for ones with extended length. It will place the burn chamber of the bulbs further out and away from the socket, decreasing the amount of heat building up around socket and bulb base. -
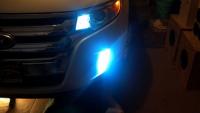
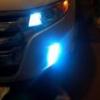
HyPer AutoLites Custom Installs
HyPer replied to HyPer's topic in Glass, Lenses, Lighting, Mirrors, Sunroof (BAMR), Wipers
We used P.A. Electronics Inc's 5mm 3-circuit chips, each DRL housing now has a 5.75w power draw at 12v(4.8w at 14.4v) and outputs approximately 360 lumens(on paper). -
HyPer AutoLites Custom Installs
HyPer replied to HyPer's topic in Glass, Lenses, Lighting, Mirrors, Sunroof (BAMR), Wipers
I can but we're working on a production model now with a different less expensive(translated: less work involved) retrofit, where we'll mount the leds to strips of PCB. This way we can use different on board controllers to make them dim and brighten. The ones shown above stay full brightness all the time, but wired differently, they could have 3 stages of brightness. A show-only edge will get color changing drls up front that can use white while on public roads, then switch to different colors when at shows. -
HyPer AutoLites Custom Installs
HyPer replied to HyPer's topic in Glass, Lenses, Lighting, Mirrors, Sunroof (BAMR), Wipers
Yeah, I'll do some tinkering with the camera and edit in the correct looking pics.....if I'm successful lol. Oddly enough, the nighttime pics with the lights off, are the correct color, like the first pic. It's with the shop lights on, that the color goes all whacky.
